To set up the anyconnect VPN client, The Anyconnect VPN Client is stored on the flash and then downloaded and installed on the client. The VPN client can be removed after the session is terminated and can be left on the client PC depending on the router configuration. If the VPN client is left on the PC, subsequent connections would not require downloading the anyconnect client on the PC.
The anyconnect-win-2.3.2016-k9.pkg is the latest release of the anyconnect client on cisco site. You need a CCO account to download this.
Steps.
1. Copy the VPN Client to the memory of the Router.
WEBGATEWAY#copy tftp flash:/webvpn/svc.pkg
Address or name of remote host []? 10.10.10.2
Source filename []? anyconnect-win-2.3.2016-k9.pkg
Destination filename [/webvpn/svc.pkg]?
Loading anyconnect-win-2.3.2016-k9.pkg from 10.10.10.2 (via FastEthernet0/0): !!!!!!!!!!!
[OK - 2672571 bytes]
Verifying checksum... CCCCC OK
2. Install the client on the router
WEBGATEWAY(config)#webvpn install svc flash:/webvpn/svc.pkg
SSLVPN Package SSL-VPN-Client : installed successfully
WEBGATEWAY(config)#
3. Set up the local pool
WEBGATEWAY(config)#ip local pool ANYCONNECT 192.168.1.5 192.168.1.50
4. Configure the webvpn context to support anyconnect.
WEBGATEWAY(config)#webvpn context SSL
WEBGATEWAY(config-webvpn-context)#policy gr SSLVPN
WEBGATEWAY(config-webvpn-group)#function svc?
svc-enabled svc-required
WEBGATEWAY(config-webvpn-group)#function svc-enabled
! svc-enabled allows fall back to thinclient and clientless mode if ! anyconnect fails.
WEBGATEWAY(config-webvpn-group)#svc address-pool ANYCONNECT
WEBGATEWAY(config-webvpn-group)#svc keep-client-installed
! keeps the vpn client on the client after the session has been terminated
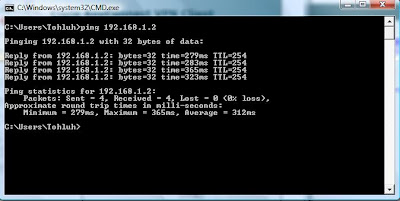
TEST Here are some snapshots from my PC
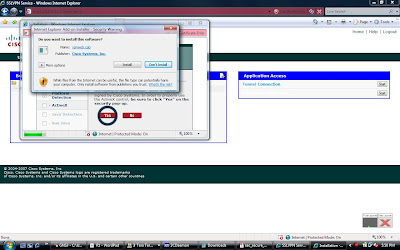
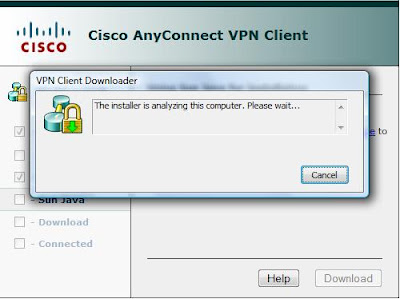
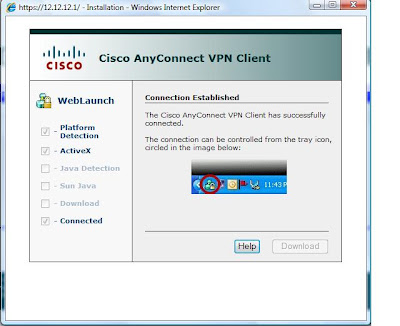
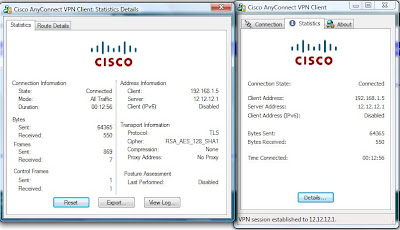 Test connectivity to the internal network..
 But connectivity to the local LAN is lost...
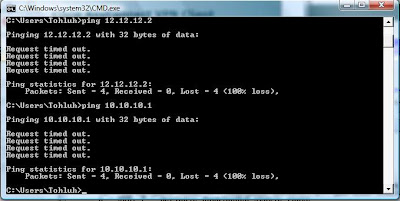
To configure split Tunneling
WEBGATEWAY(config-webvpn-group)#svc split include 192.168.1.0 255.255.255.0
TEST Disconnect and reconnect. ;)
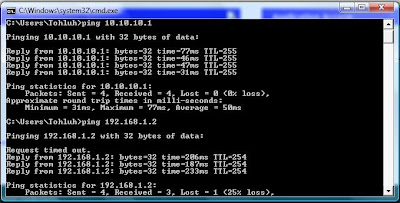
Anyconnect is up and running! :-)
N.B: When setting up SSLVPN on GNS3 using windows vista (like I did), ensure that the VPN client is copied to flash:/webvpn/svc.pkg as the router would not be able to modify the file system of the flash when you use the webvpn install command.
2. You might need to recreate a trustpoint after reloading the router.
3. If you are using the self signed certificate and Internet explorer, ensure that the webvpn gateway address is added to your trusted sites otherwise the anyconnect download would fail.
In real world scenarios, we might need to setup VPN and NAT for enhanced security (and connectivity), In the next post, I would discuss the nteroperability of NAT and VPNs.
Ciao.
Amplebrain.
nice post.
ReplyDeleteregards
shivlu jain
http://shivlu.blogspot.com
For some reason the problem was with the "ppp authentication" method. It was trying to authenticate with the IAS using ms-chap-v1 and chap but not pap. I had to explicitly enable pap and disable ms-chap-v1 and chap. The everything worked fine.
ReplyDeleteVPN
This comment has been removed by a blog administrator.
ReplyDelete